Showing posts with label Christmas Tree. Show all posts

Wednesday, October 26, 2011

Oh Christmas Tree.....


...Oh Christmas tree!

You've watched the journey of the little Christmas tree and I'm really thrilled with the way it turned out.  My only wish was that I was or knew a professional photographer because my camera didn't do this gorgeous tree the justice it deserves.  Regardless, my hope for this tree was to share with everyone what is possible.  Not only was the tree and all the decorations purchased at the dollar store but I truly believe that each and everyone of you can now create something wonderful using the simple techniques I have shown.  Remember, it's not what you have....it's what you do with what you have!

Last year I decorated a 3 1/2 foot Christmas tree complete with decorations and lights.  It was donated by me, to a church to raise funds for necessary renovations.  I was so thrilled to receive a letter by the individual who asked me if I would be so kind to donate something, saying that they had graciously raised over $500. on my tree alone.  Apparently, there was a very generous lady who loved my tree and who was watching the bidding and saw how much interest it was receiving.  She not only placed a $250. bid on the tree to win it, but put it back up for auction to which it received another final bid of over $250.  You can't imagine how happy I was to learn this.  It was for an awesome and well deserved cause.  I truly believe that if you have a talent, it should be shared.  The gift of giving!!

I was recently asked to donate something to be auctioned off this Friday for a local Hospice.  They didn't have to ask me twice as my Aunt who passed away only months ago used this same Hospice until she passed.  I am happy to be able to offer this beautifully decorated tree in hopes that it will raise some much needed funds.  The timing was perfect.  I was decorating my little tree and they needed something rather quickly ...worked out beautifully!


It's gone from this....
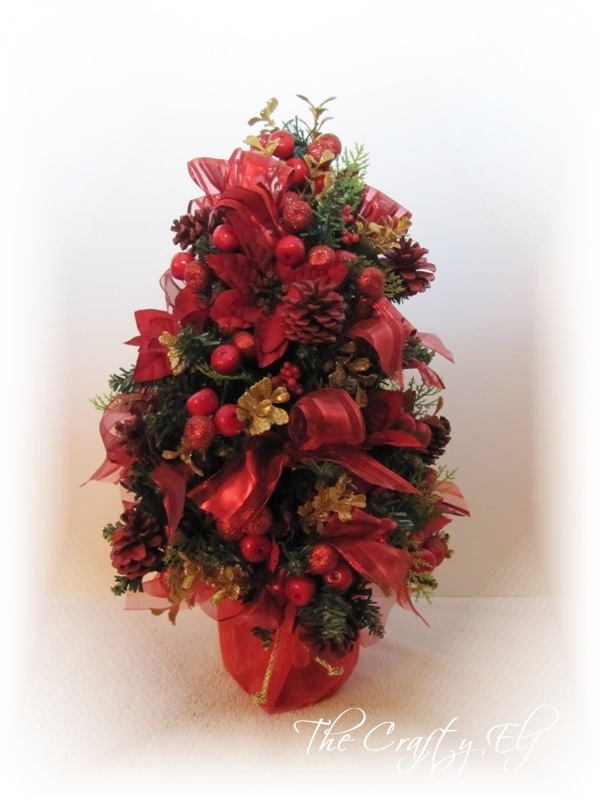


To this!


I want to thank each and everyone of you for commenting and watching the journey of my little tree.  I hope that I have inspired you.  I will be sharing many more creations over the next few months so if you are interested in some of the different techniques I have learned over the last 25 years, I'd love to share them with you.

Want to see some other amazing inspiration, you should make a point of visiting Julia at the Stamping Ground.  It is a weekly jaunt around the globe where you can peek into the creative worlds of many.  Something that you won't be sorry you did!

Wherever you are in your day, I hope you are enjoying it
Wishing you many wonderful creations!

Photobucket

Tuesday, October 25, 2011

The Ribbon.....

...has been added to the tree!

It's done!  My little tree has finally got the ribbon on and all that's left is the base of the tree.

So here is how my little tree began its decorating journey


The ornaments


The tree before


The tree after being fluffed


The greenery and the poinsettias


The gold glittery branches


The cherries


The pine cones


The decorated tree

before
After


Wow....I'll just add the finishing touches on the bottom and ......it'll be done!

Wherever you are in you day I hope you are enjoying it.
Wishing you many wonderful creations!

Photobucket

Monday, October 24, 2011

Trimmings On The Tree .....

...almost done!

All the ornaments are on the tree so all I have left to do now is the ribbon and the base of the tree.  Before I get to that though, I want to show you quickly how I added the remainder of the ornaments.


Ready to put on the gold glittery branches


I begin with one of the longer branches.  I want this one to sit at the top of the tree.  I will still follow the pattern as discussed previously but the top is still a very important part of the tree and can't be forgotten!


Sliding the branch down into the tree but keeping it along the top branch


I get it right where I want it and secure it with wire


Perfect!  Now I will begin to follow the pattern with the remainder of the gold glittery branches.  If this is your first visit and are unsure of what the pattern is, you can either scroll down to the post below or walk over to the workshop for more detail.

Once all the gold glittery branches are wired on, I begin with the cherries.

Looking good!  All the cherries are on the tree so I'll move on to the last group of ornaments, the pine cones. 


Here I want to share how I add ornaments to a tree that have a string or cord loop attached for hanging.  As you can see I have placed the ornament on the tree approximately 1 1/2" in from the end of the branch.  You never want to hang anything on or at the very end of any branch.  After I slip the ornament on I hold it in place so the cord doesn't move.  I will begin to wrap the ornament around the branch in a clockwise direction.


I continue to wrap it until it becomes snug up against the branch

What is with the skin on my finger?  So wrinkled...ew!

Once it is snug, I carefully continue to wrap it until the pine cone is sitting on top of the branch.


Look at that...awesome!  You will also notice you can still see about one inch of the end of the branch.


I've now got all the pine cones added so all the ornaments are now on the tree and it's ready for the ribbon and the covering for the bottom!  If you want to see how I added the ornaments in further detail walk over to the workshop where I will warn you again....it's a picture heavy post! 

Wherever you are in your day I hope your enjoying it.
Wishing you many wonderful creations!

Photobucket

Friday, October 21, 2011

As Promised....

....I've started to decorate my dollar store tree.


There's my little tree back there which I just love!  I've separated the candle ring pieces


Here are the poinsettias


There is all the greenery and look at my little tree now


Isn't it gorgeous?   If you want all the details walk over to my workshop and have a look.  I must warn you, it's a lengthy post.

Hope this helps to inspire you and maybe get ya just a bit more excited about the season!

Wherever you are in your day, I hope your enjoying it.
Wishing you many wonderful creations!

Photobucket

Thursday, October 20, 2011

Last But Certainly Not Least!

The pine cones!

Normally I would never go out and purchase pine cones.   There is always an abundance of them lying around where I live and they are all different shapes and sizes.  I often use pine cones as I find them in their natural beauty but I've been known to spray paint a few too.  Not going to lie, a little glitter may have found it's way on one or two over the years, it really depends on what I'm doing and the look I'm going for.

Here are the pine cones out of their package.  As you can see they have been blessed with a little touch of red.

And look, they have little loopy things attached to them.  That's perfect for hanging and I'll show you how this Elf does it.  Bet you didn't think there was more than one way to hang an ornament did you?  Well, there is!


Remember my tree?  How could you forget it!  See that plastic green 4" diameter flower pot?  I'm going to make it pretty.


I've purchased some gold cording which also happens to be wired.  Having the cording wired is not necessary for this project but it will come in handy in the future.


This is the fabric giftwrap from the stash, do you remember seeing it?


Back there in the top left corner.  It's going to be used to make the base of the tree look amazing!


Here is the gorgeous red glitter poinsettia which is approximately 5" in diameter.  Stunning!


And the ribbon!  Gotta have ribbon!  These bolts were purchased at Costco.  There is 50 yards of wired ribbon on each bolt at a cost of $7.96 for each.  I use a lot of ribbon this time of year so for the price and the yardage, I'd be a fool not to purchase it. 


I've got everything I need now and it's all ready to go. I can't wait to start decorating my little tree. 
If you are interested in a few more details walk over to the workshop and check things out.

Wherever you are in your day, I hope you're enjoying it.
Wishing you many wonderful creations!

 Photobucket

Wednesday, October 19, 2011

Recipe for Cherries....


...on the Christmas tree!

Almost done getting all the goodies ready for my tree!

Today's project was the cherries.


The plain cherries


The glittery cherries


All the cherries combined


What lovely decorations for my Christmas tree.  Walk over to my workshop if you are interested in seeing how I separated these cherries and what I did with them when I was done! 

My goodies so far.  Remember the stash?


The tree


Poinsettias


Gold glittery stems


And now my cherries. 


Almost done, only a couple more goodies to go!

Wherever you are in your day I hope your enjoying it.
Wishing you many wonderful creations.


Photobucket